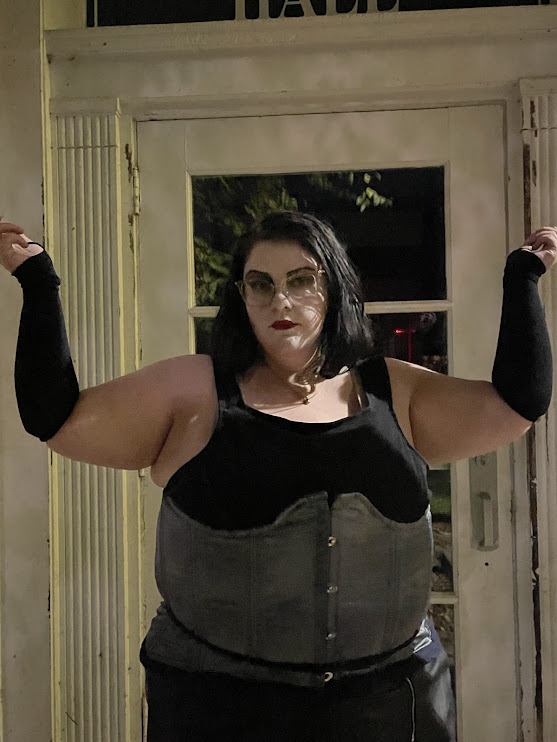
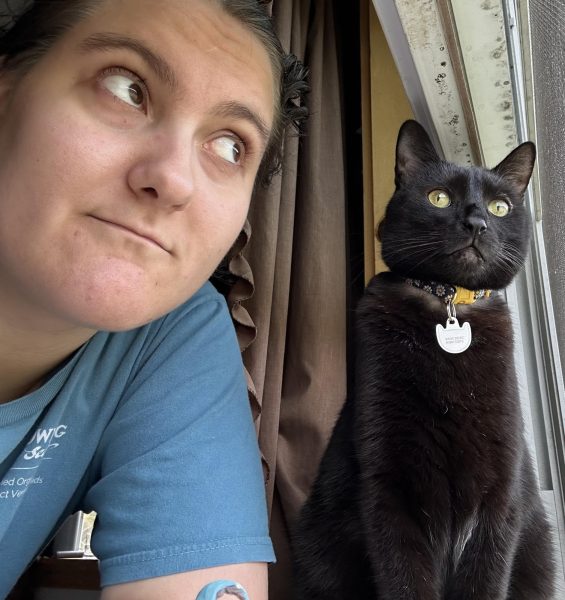
No, I am never gonna go away. Fuck you.
So for this round of chaotic babbling also known as this column, I shall be discussing the wonderful world of dynamic poses and how to draw them by using references. A reference is something we artists use to help us draw something, or even to help us learn to draw something. In fact, most artists since the beginning of art have done this. We look at the world around us and draw what we see.
So yeah, I will be teaching you how to draw shit like this.
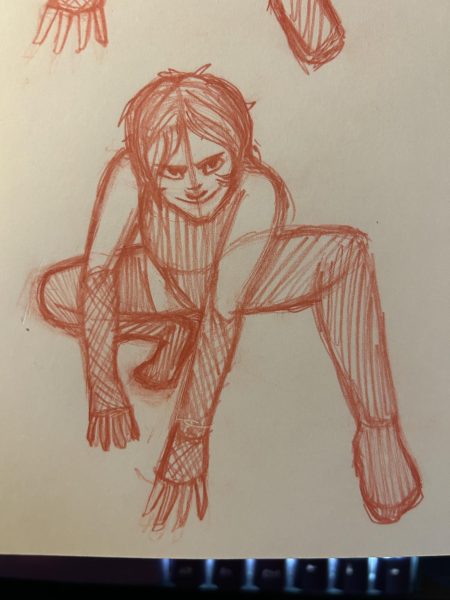
“How? That looks so hard!!” I hear you whining. Well, shhhhhhhhh, and let Daddy Sage explain.
In my experience, I’ve found that a lot of beginner artists tend to draw poses or bodies in pose from memory and I’m here to tell you no. Stop that. Shut up. The bad thing can’t hurt you anymore.
”But wait, Sage, isn’t that the mark of a good arti—“ Finish that sentence and I will slit you open from mouth to anus and wear you like a jacket. (Rest in peace Andre Braugher.) No, no, my dear reader, in fact, drawing poses are not always done from memory, and even competent and well-trained artists sometimes need reference poses. References are always okay, and if you’re like me and grew up on the internet, you probably heard a lot of idiots claim otherwise. They lied to you. Simple.
References for poses will get you immensely far. And you can even make your own reference photos! So I decided to do what we call in the industry a “fuck it, might as well photograph myself” and did that.
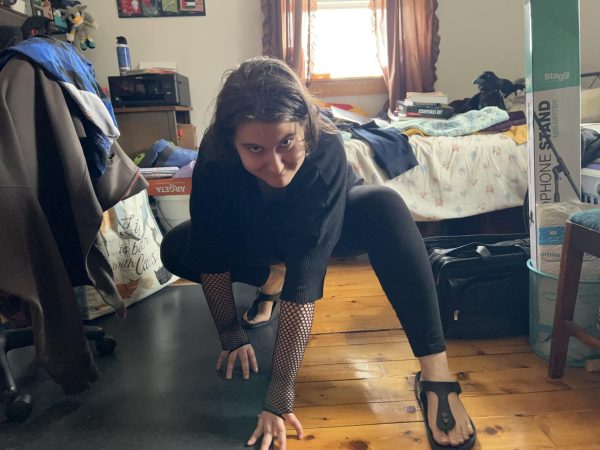
Ignore the upsetting state of my room and my silly face, it’s been cleaned since then I promise—
With this image in mind, let’s try and use it as a reference. In my own process, I got this result:
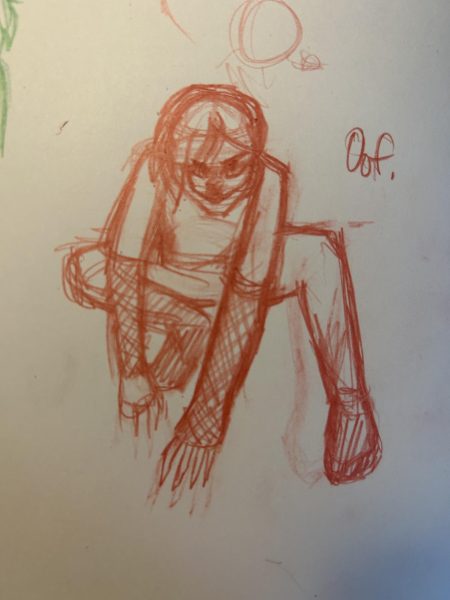
It’s… meh. It’s still not quite right. It’s clear that I eyeballed it and didn’t do much else beyond that. Now, I could keep doing this and try and draw it again and again, and that can help, but it’s also just brute forcing myself to do it. And after a while, it would get just tiresome and you will get annoyed. So, what do we do?
Simple: break down my original photo reference into shapes.
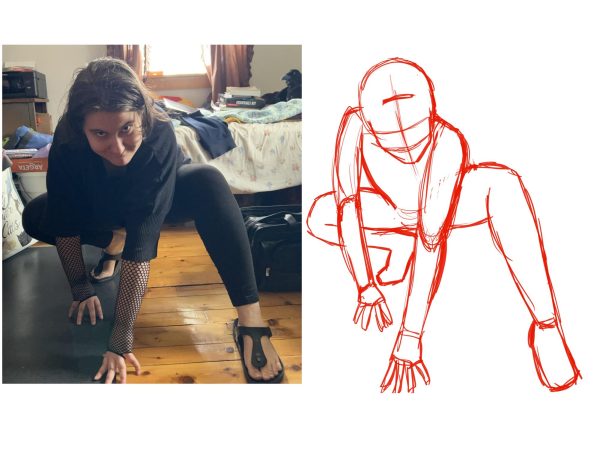
In previous issues, I’ve talked about the importance of breaking down the human body into shapes which can be used to help simplify the process. And I decided why not heed my own advice? I broke down the image by tracing over it in my app of choice (Procreate for me but you can use apps like Sketchbook or Medipaint, which are free).
This helps a lot with understanding how the body moves and how the shapes connect. As for which shapes to use, keep in mind how the forms of the body look. If you want a better understanding of this, I recommend any of Ethan Becker’s vids (Senpai please notice me).
So, with this in mind, let’s try drawing it again:
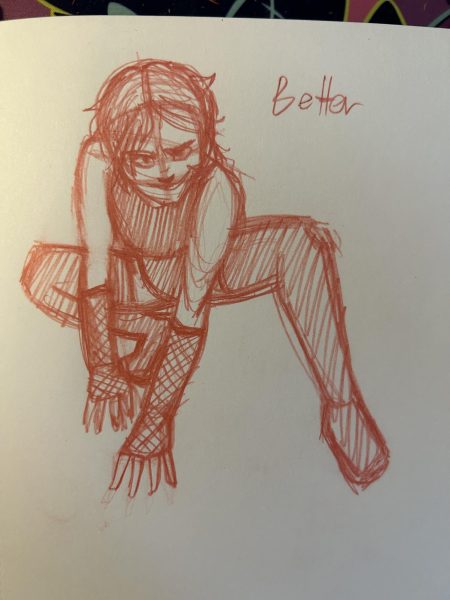
Okay, that’s a lot better! I’m paying more attention to shape language and first jotting down the shapes before doing anything drastic like adding detail. If I must hammer anything into your thick skulls, it would be this: details go last.
Mind you, it’s still a bit wonky and not perfect, but because I broke it down and tried again, I have a better idea of the perspective of the image with the shape language. I can now look at this and think “hm, the back foot looks like it’s facing sideways when it should be facing more towards the camera. And that same leg should be curving downwards and not upwards.”
So, with that in mind, I did my final attempt:

Obviously, it isn’t perfect and has a few things I could nitpick, but as I’m drawing this again, I’m noticing more and more things I can improve upon. And here’s another bigly clever thing that I think should be mentioned: Do you see how the angles of the shoulders and the legs are not parallel? How they are… the opposite?
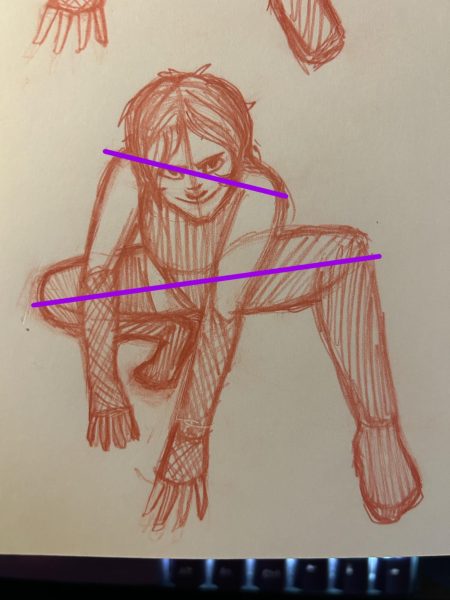
A lot of artists call this kind of pose with how the hips and shoulder lines stand “contrapposto” – all the weight is on the leg in the back, leading to the line we see here at the hips and thighs, with the shoulders being the opposite—Nonparallel! That’s the term—they’re nonparallel. The right leg has all the weight on it, seeing as the line is slanted downwards in said direction, while the shoulders are a different story because it helps stabilise the body.
Now, there are still issues with this pose. For one, the legs and the angle we see the legs at the original image is still awkward, so if I were to try again, I’d pay attention to the perspective. This is what I mean:
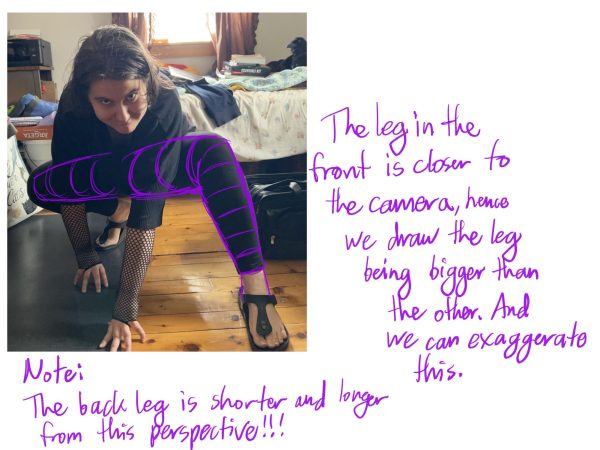
So here are a couple of final notes for you to keep in mind if you wanna make your own reference photos:
- Don’t wear baggy clothes. Wear as little as possible or tight fitting clothes so that you can see the body and how it moves. I obviously didn’t do this, but if I could go back, I’d redo the pose.
- Use the photo timer setting on your phone. If you don’t know how to do that, google it or something, I don’t know, I’m not your dad–
- When breaking down the body into shapes, make sure you include the perspective lines. Keep in mind how the body looks in relationship to how close each individual body part is to the camera or from specific angles. Also mind how large or small or long or short limbs, torsos, and heads appear in relation to the camera and angle.
- Don’t worry about looking silly. I look extremely silly in the photo I took of myself, and honestly, that’s okay. No one is going to see these photos except for you (unless you publish them, like what I just did lol.
- Try many different poses and angles too. I used a tripod to help me get the exact angle I wanted, but if you don’t have one or can’t afford one, you can use books and other objects to set your phone or camera on. However, if you plan on making this a common practice, I’d say get a tripod. You can buy them pretty cheap on Amazon or Walmart (the off brand stuff is just as good at times). Or if you are like me and don’t wanna give soulless corporations your money, there are local camera and video stores you can go to and get one.
- And finally, YOU DON’T NEED TO DO ALL THIS! You can very easily just find a reference pose online on websites like Pinterest or learn to use 3D models for references. (Don’t use AI. If you use AI, I will hunt you down and feed you to the artists whose work these algorithms are plagiarising.) But the reason why I am advocating for making your own poses and references is for those tricky spots where you simply can’t find the exact image you are looking for. But if you don’t want to do that, no shame, but I will warn you that it can take forever to find the PERFECT image.
Overall, I think I’ve said what needs saying, but the final tip I wanna impart to you would be this: when you practise your art skills and try to do more things outside of your comfort zone, practise smart, not hard. Use technology to help make it easier for you. There is no shame in tracing a photo reference to understand how the form works.
Fucks sake, I frequently trace my own poses just to get shit done. It’s not against the law to use what resources you have. And make sure you practise. Do several sketches, and you’ll improve more and more. If I had decided to keep going, I probably would have gotten a really great result!
Any comments or questions can be emailed to us at [email protected] or if you are online, you can leave a comment below!
Happy drawing, losers!


